
To understand how to adjust thermostatic radiator valves, start with the room: choose a setting on the control, check the room temperature and make gradual adjustments. Turning the dial every time the radiator feels warmer or cooler makes it difficult to find a stable setting.
This guide covers mechanical thermostatic heads already fitted to water-filled radiators. If you have electronic controls, timed programmes or a system that connects the heads to the boiler, follow that system’s instructions: operation and settings may differ.
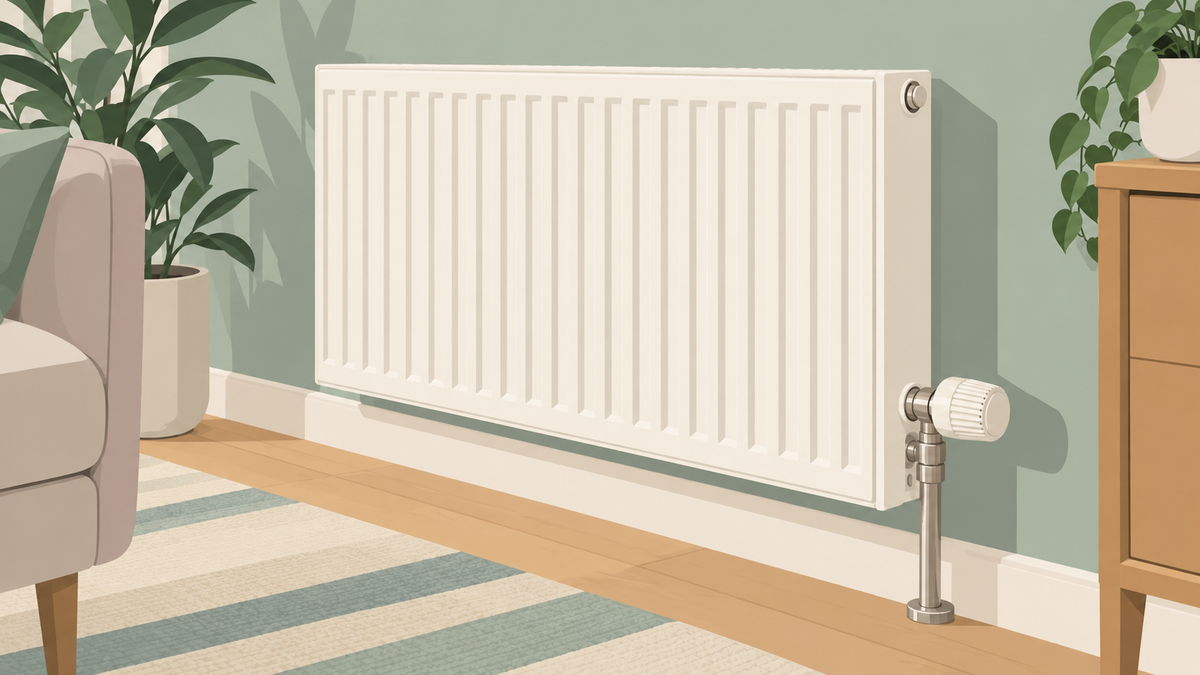
Thermostatic head, valve body and lockshield valve
The thermostatic head is the control you turn. Its sensor responds to the air temperature and operates the valve body, regulating the flow of water through the radiator. As the room warms up, the flow decreases; as it cools down, the flow can increase.
The valve body is the component connected to the heating system. A body designed to accept a thermostatic head may be sold with a manual control: that provision alone does not mean it already provides automatic temperature control.
The lockshield valve is another component in the circuit, used to isolate and regulate the flow. Do not use it as your everyday control for choosing how warm you want the room to be: leave hydraulic adjustments to your installer.
What the numbers on the dial mean
The numbers indicate room temperature settings. The corresponding temperatures differ between models: a table you find online does not replace your manufacturer’s information. Identify the brand and model code of the head, then consult its instructions.
On a numbered scale, a higher setting generally means a warmer room. The number is not the water temperature and does not measure how hot the radiator’s metal is. Do not expect the same position to give an identical result in two different rooms.
If you see a frost protection symbol, check the manual for its purpose and the conditions it needs to work. Do not treat it as a guarantee of protection for the whole system, particularly if the heating is switched off or cannot supply heat.
Try adjusting one room at a time
Before you start, check that the heating is within its normal operating period. For a shared heating system, follow the hours provided; for your own system, check the normal programme on the room control. Do not change the boiler’s technical parameters for this trial.
- Identify the control. Make sure it is a thermostatic head and read the instructions for its model. A simple manual dial requires a different approach.
- Note your starting position. If you do not already have a satisfactory setting, try an intermediate level allowed by the manual, without assigning it an assumed temperature.
- Check the room. Place a thermometer in a representative part of the room, away from the radiator, direct sunlight and draughts from the window. Also note how comfortable you feel.
- Let the room settle. Avoid changing the setting every few minutes. Compare the result once the room has had time to stabilise; the time needed depends on your home and heating system.
- Make small adjustments. If you feel too warm, lower the setting slightly; if you feel cold, raise it slightly. Check again under similar conditions and keep the position that suits you.
To make the comparison easier, keep a note with four entries: room, dial position, measured temperature and how comfortable you feel. In your study, for example, record how it feels during the hours you work there, rather than comparing a morning reading with one taken just after opening the windows.
You do not need to set every radiator to the same number. Room use, exposure and the building’s conditions vary: find a setting suited to each room, taking account of the people who use it.
The sensor needs to detect the room’s air temperature
A curtain in front of the head, a radiator cover or a recess can affect the temperature it detects. Direct sunlight can also distort the reading. Before turning the setting up, check whether the control is covered or enclosed in a space that does not reflect the room’s conditions.
Move loose objects that cover it. If the problem comes from the radiator’s position or fixed furniture, ask your installer to assess a suitable solution, possibly with a remote sensor. Do not change the valve’s orientation or connections yourself.
Coordinating radiator valves and the room thermostat
In a conventional system, the mechanical head controls its own radiator; the thermostat and the system’s programme determine when heat is supplied. Turning the head up does not, by itself, start a heat source that is off.
If one room stays cold while the room containing the thermostat is already warm, tell your installer about both conditions. Coordination depends on the system: avoid blindly following a rule to open or close every radiator. With heat pumps and integrated systems, use the specific instructions.
When to stop and ask for a check
If the radiator stays cold even though the room is cold, the setting is appropriate and the heating is running, the dial alone cannot identify the cause. Have the circuit checked before buying a new head.
If you find leaks, persistent noise or a control that resists movement, do not force it, unscrew fittings or try to free the valve pin. Tell the technician the brand, model, setting used and behaviour you have observed. These details are more useful than a diagnosis based only on whether the radiator feels hot or cold.
Choosing a compatible replacement
If the check shows that you need a replacement, distinguish the head from the valve body. In the catalogue, for example, you can find the Arteclima 310NO thermostatic head in matt black and the thermostatic head with a liquid sensor, 30×1.5. The ICMA Dafne angled valve is an example of a valve body.
These examples do not form a kit. Before choosing, identify your existing valve body and check the combinations specified by the manufacturer: the diameter in the product title does not establish full compatibility. You can compare components in the valves and lockshield valves collection once you have identified the part you need.